Alanna here today, taking a step back from the brand new collections and forging on with my goal to use up my old ones! I made some butterfly book ends recently with the Tigerlilly collection from Kaisercraft. The book ends themselves aren't kaisercraft, but they do have butterfly book ends as well (that I actually prefer better, but needed to use up these ones!).
I combined the pink butterfly paper from the Tigerlilly collection with pink and white paint, flowers, pearls and butterflies for the super girlie look I was wanting. I love how feminine they've turned out.
I especially love the little white butterflies sticking out of the flowers. I coated the wooden flourishes with opaque white enamel accents and glued them into place with glossy accents - hope they last!
The back piece is printed words from another Tigerlilly paper - just something plain for the back as they won't really be seen. A nice little "secret" bit of inspiration :)
Thanks for stopping by today :)
Showing posts with label Alanna. Show all posts
Thursday, August 1, 2013
Saturday, July 27, 2013
More Sweet Pea inspiration
Alanna here to share a quick card with you using this month's Sweet Pea collection from Kaisercraft.
I used the paper pad, sticker sheet and 4x6 journaling pieces on the paper "nifty". I teamed it all with Scarlet cardstock.
Thanks for stopping by.
I used the paper pad, sticker sheet and 4x6 journaling pieces on the paper "nifty". I teamed it all with Scarlet cardstock.
Thanks for stopping by.
Saturday, July 20, 2013
Sweet Pea Wall Art
Hey everyone, it's Alanna here today. Sorry it's been a bit quiet on the blog front this month - we're all had some unexpected things pop up in our lives over the last couple of weeks. But I'm here today to share a beyond the page project I started a week ago, and finally finished today. Rushing to get it up on the blog (the glue hasn't even dried yet!) so I can go have a nap before my night shift tonight!
As some of you might know from the facebook page, Kerry and I went over to Geelong, Victoria, for Kaisercraft's annual retailers day. While there, we got to shop in the warehouse. And by shop, I mean, I walked around picking things off the shelves and convincing Kerry to get them for me ;) These BTP 3D wall arts were one of them - I got them in butterfly, heart, and today's project - bird. I can't beleive how easy this was to make - don't let the fact it took me a week to get it done fool you...
I used this month's Sweet Pea collection from Kaisercraft - papers (dandy and sassy), sticker sheet and collectables. I also used KaiserColour paint (pale beige) and a pearl (latte) for the birds eye. And I inked the edges with Tim Holtz antique linen distress ink.
I cut a quote from the sticker sheet in thirds and also added a subtle heart that blends in perfectly with the background paper. I raised both of these up on foam tape. For those of you who don't like using stickers (like me) I have two little tips for you. One, is what I do more often than not - adhere foam tape to the sticker and then you can play around with positioning a lot easier. The second tip is from Melissa Kennedy herself - talcalm powder on the sticker and it looses its stick.
All the flowers and leaves in this bottom corner are from the collectables pack. Again, I raised a couple up with foam tape. Love adding dimension, especially to beyond the page projects!
And that's it. Thanks for stopping by the blog today :)
As some of you might know from the facebook page, Kerry and I went over to Geelong, Victoria, for Kaisercraft's annual retailers day. While there, we got to shop in the warehouse. And by shop, I mean, I walked around picking things off the shelves and convincing Kerry to get them for me ;) These BTP 3D wall arts were one of them - I got them in butterfly, heart, and today's project - bird. I can't beleive how easy this was to make - don't let the fact it took me a week to get it done fool you...
I used this month's Sweet Pea collection from Kaisercraft - papers (dandy and sassy), sticker sheet and collectables. I also used KaiserColour paint (pale beige) and a pearl (latte) for the birds eye. And I inked the edges with Tim Holtz antique linen distress ink.
I cut a quote from the sticker sheet in thirds and also added a subtle heart that blends in perfectly with the background paper. I raised both of these up on foam tape. For those of you who don't like using stickers (like me) I have two little tips for you. One, is what I do more often than not - adhere foam tape to the sticker and then you can play around with positioning a lot easier. The second tip is from Melissa Kennedy herself - talcalm powder on the sticker and it looses its stick.
All the flowers and leaves in this bottom corner are from the collectables pack. Again, I raised a couple up with foam tape. Love adding dimension, especially to beyond the page projects!
And that's it. Thanks for stopping by the blog today :)
Thursday, July 4, 2013
Sweet Pea Card Tutorial
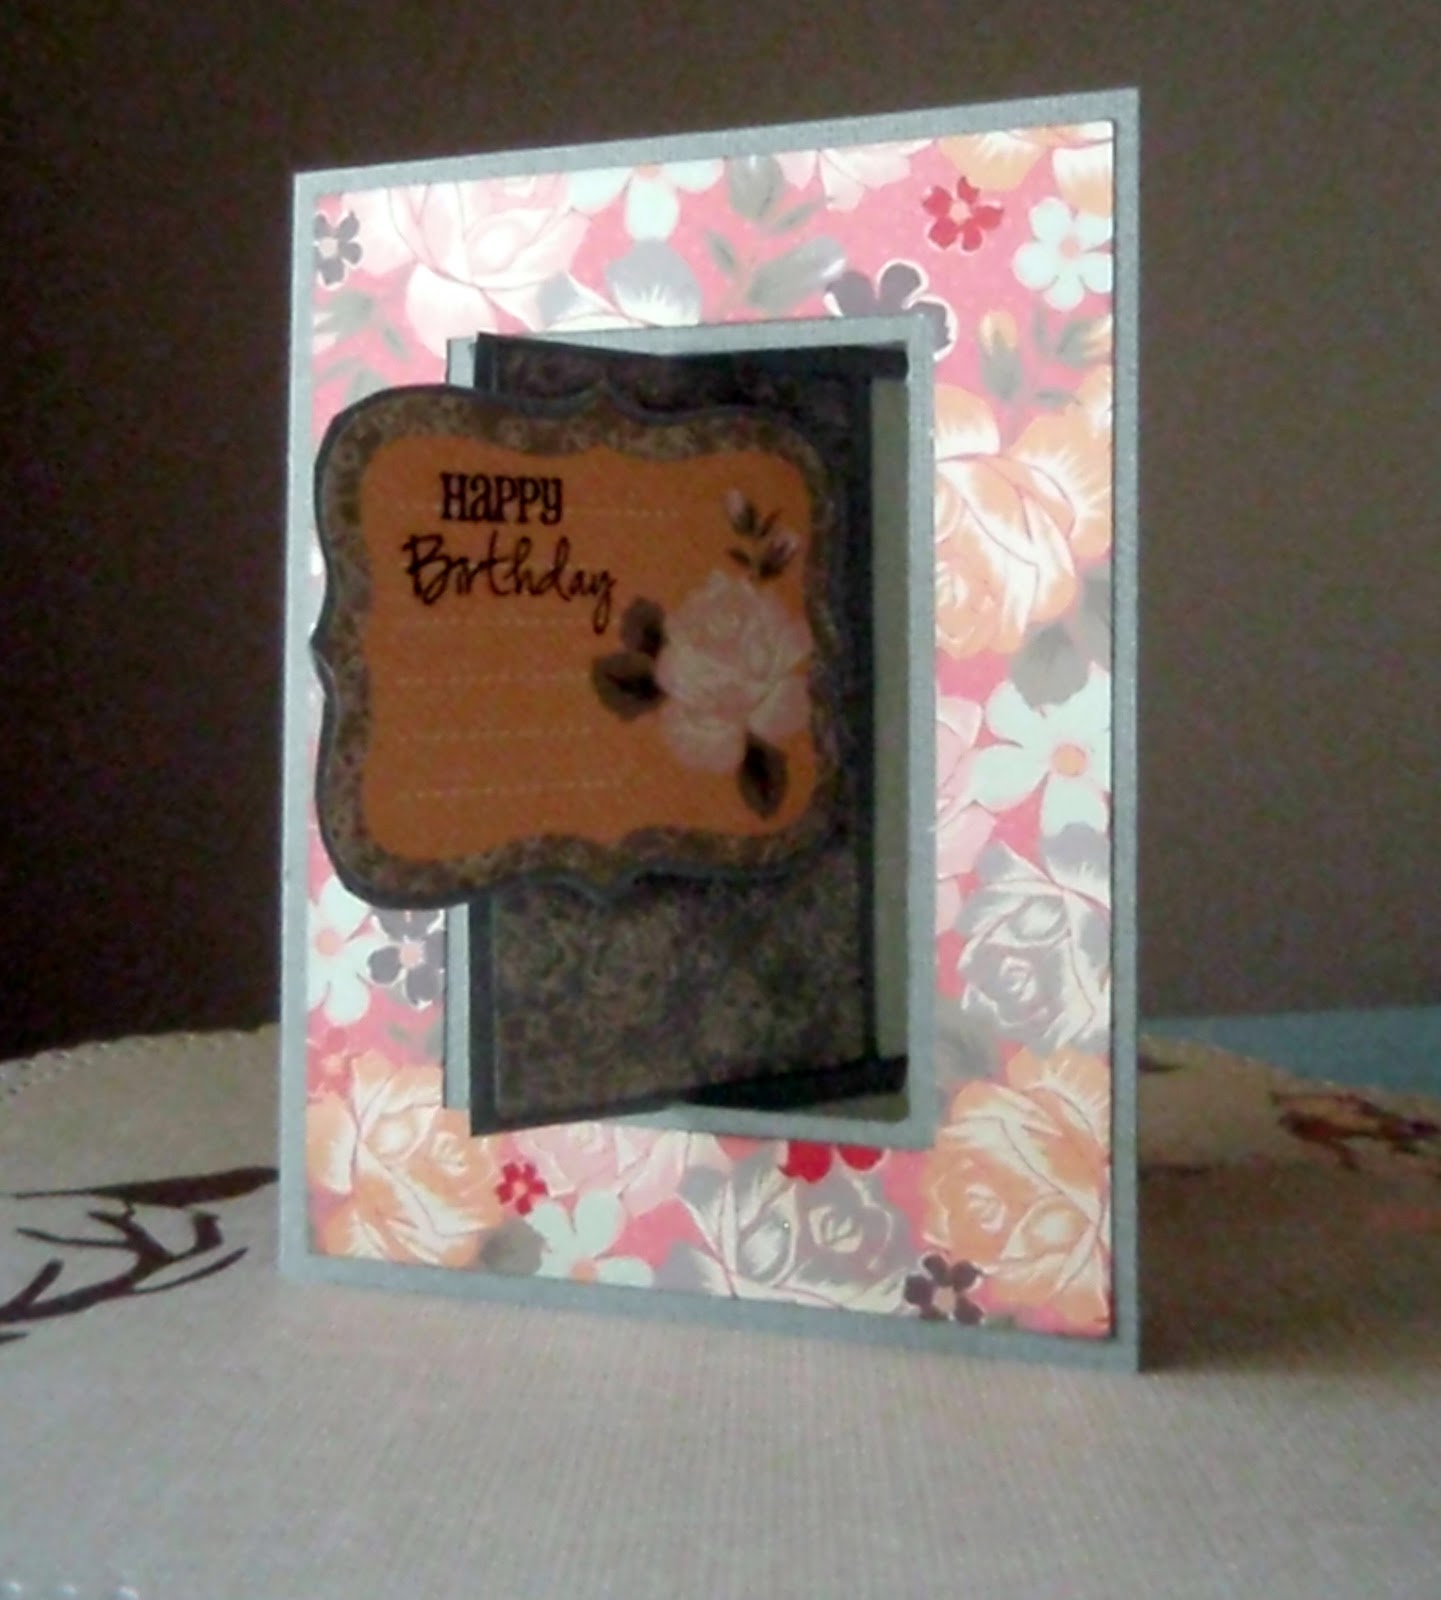
Hi everyone, it's Alanna here today to share with you a card I made with the new Sweet Pea collection from Kaisercraft (available here in Kerry's store). I've put together a little tutorial as well for you.
First of all... the card we will be making:
Please note, the finished card is 4 1/4" x 5 1/2" in size.
And now for the tutorial:
Supplies
Step One - Making the Card Base
Score the first piece of cardstock at 4 1/4" and fold in half. On the side that is the front, cut a window, 1” from all 4 sides.
Step Two - Making the Lever Insert
Score the second piece of cardstock at 4 1/4" and 6 3/8”. Go in 2 1/8” from the left edge and score down to 1” from the top and up to 1” from the bottom.
To cut the “lever” that will fit through the card front “window”, go in 1” from the left edge and cut a slit that starts 1” from the top and goes down to 1” from the bottom.
Adhere smaller pieces as shown in picture below to remaining panel.
Thanks for stopping by today! I would love to see your creations from this tutorial so please post on the facebook page, or in the comment section of this blog post.
PS. This tutorial was adapted from one on SplitCoastStampers which you can find here, along with a video by Laura Lipe.
First of all... the card we will be making:
Please note, the finished card is 4 1/4" x 5 1/2" in size.
And now for the tutorial:
Supplies
- 2 pieces of cardstock - 5 1/2" x 8 1/2"
- Papers of your choice (I've used the Sweet Pea paper pad)
- Paper cutter and scoring tool (I've used the score blade that came with my trimmer)
- Adhesive
- Coordinating embellishments/stamps/etc to decorate your card
- Bone folder
- Craft knife and ruler
- Ink for edges
Step One - Making the Card Base
Score the first piece of cardstock at 4 1/4" and fold in half. On the side that is the front, cut a window, 1” from all 4 sides.
Step Two - Making the Lever Insert
Score the second piece of cardstock at 4 1/4" and 6 3/8”. Go in 2 1/8” from the left edge and score down to 1” from the top and up to 1” from the bottom.
To cut the “lever” that will fit through the card front “window”, go in 1” from the left edge and cut a slit that starts 1” from the top and goes down to 1” from the bottom.
Cut from the top and bottom ends of that slit over to the 2 1/8” score
line. This produces the “lever” that will fit through the front window.
Fold on all score lines. Folds should be valley/mountain/valley folded.
Step Three - Putting them Together
Add adhesive to the “backside” of the left and right panels of
the cardstock you just scored and glue it inside the card. The “lever”
tucks inside of the front “window”. If this is a tight fit, trim a
sliver off the top and bottom of the lever so that it will move freely
through the window.
Step Four - Decorating and Embellishing
Front of the card -
Cut a 4” x 5 1/4” piece of patterned paper. Cut in 3/4” from all 4 sides to allow for the window. Ink edges if you wish and adhere to the front of your card.
Inside of the card -
Cut three strips of patterned paper 1 7/8" x 5 1/4".
Cut two small pieces 1 7/8" x 3/4".
Cut one long strip 7/8" x 3 3/8"
Ink and adhere two of the thin strips to the right hand panels on in the inside of the card.
Take the 3rd thin strip, cut in 1” from the right side, 3/4” from the top and 3/4” from the bottom. Cut vertically between those two cuts to make a C shaped piece for the left hand panel of your card. Ink and adhere.
Adhere smaller pieces as shown in picture below to remaining panel.
Front panel -
Cut a rectangle 3 3/8" x 2" to fit on front panel. I used a different paper to what I was using for the fronts and insides of the card.
Decorate remainder of card as desired.
Thanks for stopping by today! I would love to see your creations from this tutorial so please post on the facebook page, or in the comment section of this blog post.
PS. This tutorial was adapted from one on SplitCoastStampers which you can find here, along with a video by Laura Lipe.
Monday, June 24, 2013
Project Life is in store now!
Hello everyone, Alanna here today to share with you my new scrapbooking love - project life! Or "pocket page scrapbooking"...
The original Project Life concept was founded by Becky Higgins and you can read all about it on her blog over here. Basically, it is a "simplified" version of scrapbooking and you can make it as quick and easy as you want. The basic concept is to get a core kit, or papers from your stash (so many companies are making "pocket page" style items now), photos, page protectors and a pen. Put the photos and the cards in, do some journaling and you're done.
Project Life is now available to buy FROM AUSTRALIAN STORES! Up until this month, Australians had to purchase from a NZ company as they were the only retailer this side of the United States. It's a huge thing for anyone who loves this concept and so many people are getting into it now it is more available. The Becky Higgins Project Life products are available in Kerry's store right now!
I wanted to jump on today and show you a bit more about what it all is. I have a couple of pages to show you using the new Midnight and Blush collections. I'm yet to do my journaling but this shows you a bit about how the pocket pages are designed and what some of the cards look like. Midnight is my definite favourite so far!
Thanks for stopping by! If anyone has any questions about this style of scrapbooking please ask Kerry or myself! It's a great way to get lots of years into an album without the fuss! Memories into albums... that's what this is all about isn't it?
The original Project Life concept was founded by Becky Higgins and you can read all about it on her blog over here. Basically, it is a "simplified" version of scrapbooking and you can make it as quick and easy as you want. The basic concept is to get a core kit, or papers from your stash (so many companies are making "pocket page" style items now), photos, page protectors and a pen. Put the photos and the cards in, do some journaling and you're done.
Project Life is now available to buy FROM AUSTRALIAN STORES! Up until this month, Australians had to purchase from a NZ company as they were the only retailer this side of the United States. It's a huge thing for anyone who loves this concept and so many people are getting into it now it is more available. The Becky Higgins Project Life products are available in Kerry's store right now!
I wanted to jump on today and show you a bit more about what it all is. I have a couple of pages to show you using the new Midnight and Blush collections. I'm yet to do my journaling but this shows you a bit about how the pocket pages are designed and what some of the cards look like. Midnight is my definite favourite so far!
Thanks for stopping by! If anyone has any questions about this style of scrapbooking please ask Kerry or myself! It's a great way to get lots of years into an album without the fuss! Memories into albums... that's what this is all about isn't it?
Saturday, May 18, 2013
On this Day Cards
Hi everyone! It's Alanna here today and I've got a couple of cards that I made with the new Kaisercraft collection - On this Day (available HERE in Kerry's store).
First, a thank you card for the lovely midwives I worked with recently while on placement:
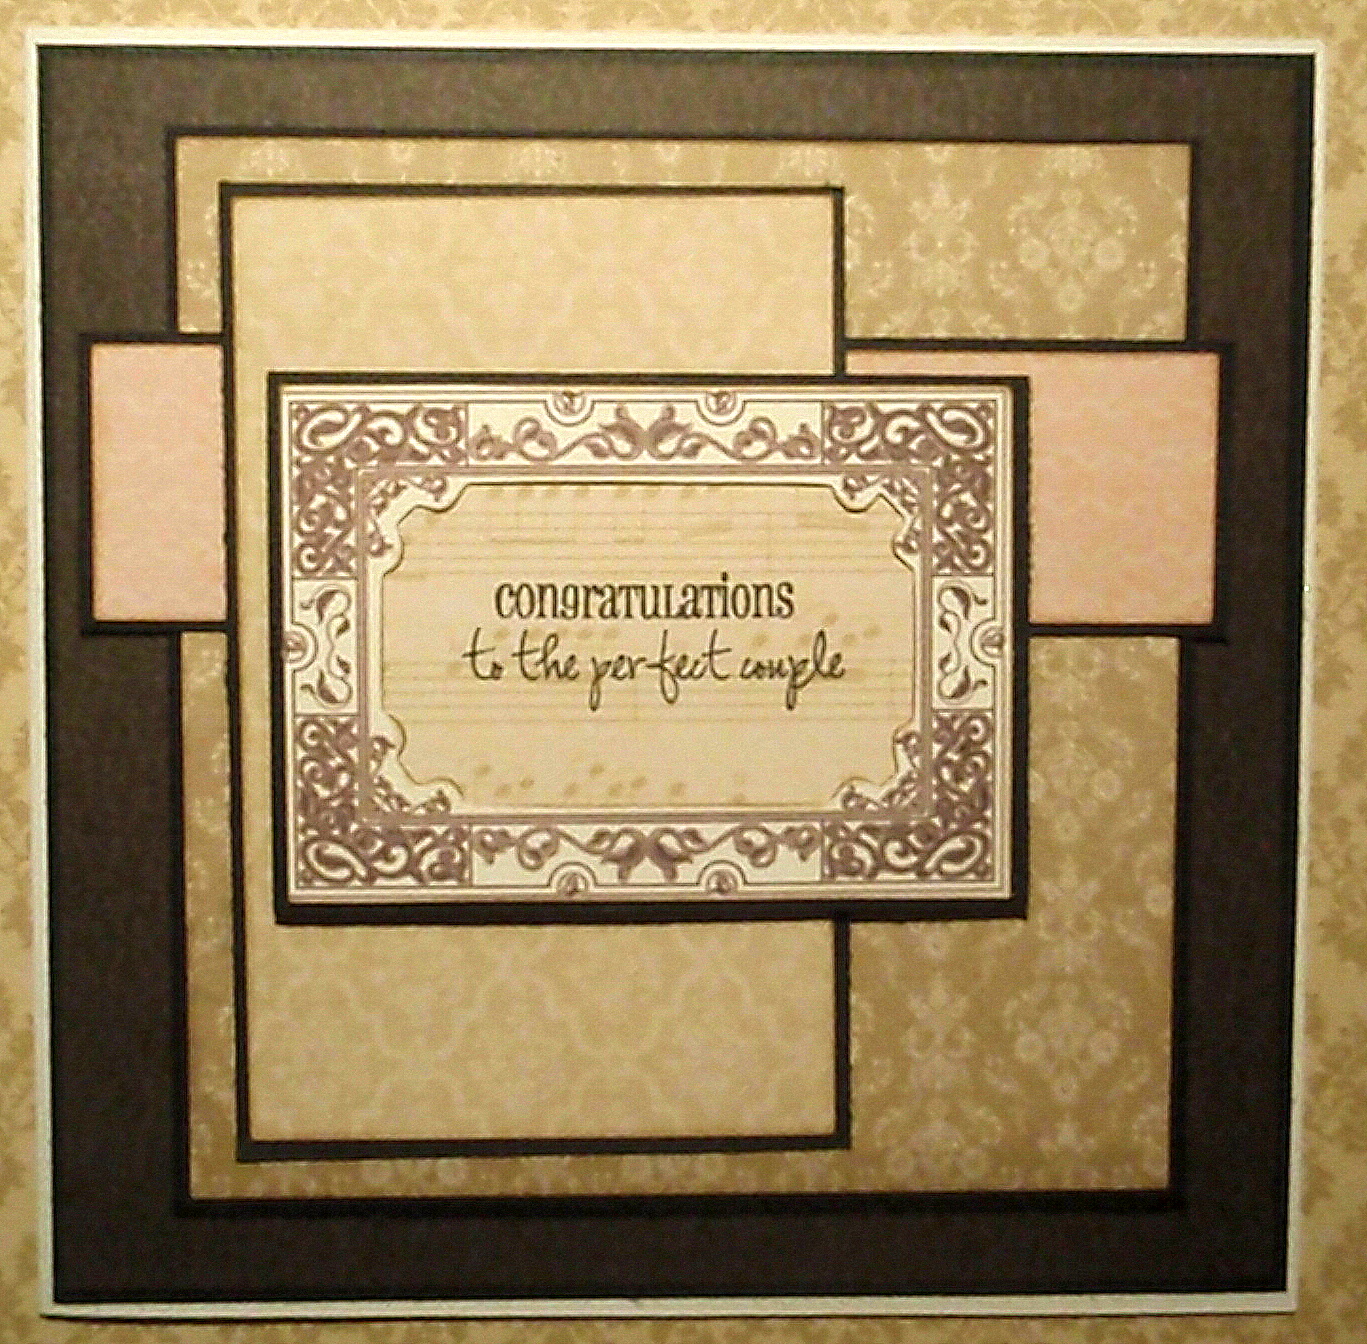
And secondly, a wedding card, just for my stash. This collection just screams weddings and engagements!
I used the kaisercraft cardstock in licorice for my matting and a My Creative Time stamp set (many greetings) for the sentiments for both cards - it's my favourite stamp set! From the On this Day collection, I used the paper pad, collectables, and 12" papers.
Thanks for stopping by the blog today!
First, a thank you card for the lovely midwives I worked with recently while on placement:
And secondly, a wedding card, just for my stash. This collection just screams weddings and engagements!
I used the kaisercraft cardstock in licorice for my matting and a My Creative Time stamp set (many greetings) for the sentiments for both cards - it's my favourite stamp set! From the On this Day collection, I used the paper pad, collectables, and 12" papers.
Thanks for stopping by the blog today!
Thursday, January 10, 2013
Ray of Sunshine
Recently, my grandmother had a fall and is in hospital recovering. Mum headed over there yesterday to spend some time with her so I made a quick card to spread some bright sunshine into her room. I used the gorgeous Hello Sunshine collection from Bo Bunny... so bright and colourful, I am really loving making cards with this range. I think I might have to make myself one just to brighten up my room!
Materials Used: KaiserCard (Coffee Bean); Bo Bunny Hello Sunshine collection: paper pad, 12" cut outs; MCT stamp: many greetings; Tim Holtz Distress Ink (black soot); Memento Ink (tuxedo black); twine.
I added a little flower to the inside as well to brighten up the stark white paper. Hope it does the tricken and brighten's up the dull hospital room...
Thanks for stopping my the blog today!
- Alanna
Materials Used: KaiserCard (Coffee Bean); Bo Bunny Hello Sunshine collection: paper pad, 12" cut outs; MCT stamp: many greetings; Tim Holtz Distress Ink (black soot); Memento Ink (tuxedo black); twine.
I added a little flower to the inside as well to brighten up the stark white paper. Hope it does the tricken and brighten's up the dull hospital room...
Thanks for stopping my the blog today!
- Alanna
Monday, January 7, 2013
Baby Gift
Hello everyone and welcome to Monday :) I'm starting one of my
midwifery placements today so am definitely in the baby mood!! Thought
I'd share with you a gift I made for a new baby... some bird bookends to
go with the theme of the nursery - birds, with a yellow, grey and white
colour scheme (they didn't know they were having a boy).
I used Bella Blvd papers from the Baby Boy collection to decorate these Kaisercraft book ends. Nice and simple, but I think they're quite cute!! I always find it hard to do baby boy gifts! I much prefer adding lots of bling and flowers for little girls!! :)
Materials Used: Kaisercraft Bird Book Ends; Bella Blvd Baby Boy collection: papers (Momma's Boy, Heaven Sent); Kaisercraft Rhinestone Strips (black); Kaisercraft Sparklets (ebony); WOW chipboard alpha; paint dabbers (pitch black); Kaisercolour (cool grey).
You can find the Bella Blvd Baby Boy collection in Kerry's store here. Of course, there is a Baby Girl one as well!
Thanks for looking!
- Alanna :)
I used Bella Blvd papers from the Baby Boy collection to decorate these Kaisercraft book ends. Nice and simple, but I think they're quite cute!! I always find it hard to do baby boy gifts! I much prefer adding lots of bling and flowers for little girls!! :)
Materials Used: Kaisercraft Bird Book Ends; Bella Blvd Baby Boy collection: papers (Momma's Boy, Heaven Sent); Kaisercraft Rhinestone Strips (black); Kaisercraft Sparklets (ebony); WOW chipboard alpha; paint dabbers (pitch black); Kaisercolour (cool grey).
You can find the Bella Blvd Baby Boy collection in Kerry's store here. Of course, there is a Baby Girl one as well!
Thanks for looking!
- Alanna :)
Saturday, January 5, 2013
Happy New Year!
Hello everyone, and welcome to 2013!! Hope you all had a fabulous festive season with your friends and family!
Alanna here today to share with you a birthday card I made for my mother-in-law with one of the new January collections - Marigold. Personally, I love the florals and colours in this collection. A lot of the cards I make are for my Mum's friends, and my relatives, so collections like this get well used in my scraproom!!
Materials Used: Kaisercraft Marigold Collection: Papers: Tawny, Paper Pad; KaiserCard (Chocolate); Kaisercraft Organza Ribbon Pack (Natural); MCT Stamp Set: Many Grettings; Tim Holtz Distress Ink (Walnut Stain); Memento Ink (Tuxedo Black).
Thanks for joining us here today on the blog. Don't forget to stop by again soon for more inspiration and projects from Kerry and myself.
- Alanna :)
Alanna here today to share with you a birthday card I made for my mother-in-law with one of the new January collections - Marigold. Personally, I love the florals and colours in this collection. A lot of the cards I make are for my Mum's friends, and my relatives, so collections like this get well used in my scraproom!!
Materials Used: Kaisercraft Marigold Collection: Papers: Tawny, Paper Pad; KaiserCard (Chocolate); Kaisercraft Organza Ribbon Pack (Natural); MCT Stamp Set: Many Grettings; Tim Holtz Distress Ink (Walnut Stain); Memento Ink (Tuxedo Black).
Thanks for joining us here today on the blog. Don't forget to stop by again soon for more inspiration and projects from Kerry and myself.
- Alanna :)
Monday, December 24, 2012
Merry Christmas!
Merry Christmas everyone!!! Hope you all have a wonderful, festive time with your family and friends. Today, I have some advent calendars to share with you, and then we will be taking a break until the New Year...
See you next year!! :)
- Alanna
See you next year!! :)
- Alanna
Saturday, October 20, 2012
Bo Bunny: Rejoice
Alanna here today to share a quick beyond the page project with Bo Bunny's Rejoice collection (find in Kerry's store here).
I used a BTP standing word from Kaisercraft and decorated simply with papers from the Rejoice paper pad and embellishments from Kaisercraft's Twig and Berry collection.
Materials Used: Kaisercraft BTP Standing Word: Joy; Kaisercolour (green); Bo Bunny Rejoice Collection: paper pad; Kaisercraft Twig and Berry collection: collectables; Kaisercraft Be Merry collection: stamps; Kaisercraft rhinestone strips (silver); Memento ink (tuxedo black).
Hope that's got you in the Christmas spirit a little... something insane like <10 weeks to go. Eek!!
I used a BTP standing word from Kaisercraft and decorated simply with papers from the Rejoice paper pad and embellishments from Kaisercraft's Twig and Berry collection.
Materials Used: Kaisercraft BTP Standing Word: Joy; Kaisercolour (green); Bo Bunny Rejoice Collection: paper pad; Kaisercraft Twig and Berry collection: collectables; Kaisercraft Be Merry collection: stamps; Kaisercraft rhinestone strips (silver); Memento ink (tuxedo black).
Hope that's got you in the Christmas spirit a little... something insane like <10 weeks to go. Eek!!
Subscribe to:
Posts (Atom)