Merry Christmas everyone!!! Hope you all have a wonderful, festive time with your family and friends. Today, I have some advent calendars to share with you, and then we will be taking a break until the New Year...
See you next year!! :)
- Alanna
Monday, December 24, 2012
Sunday, December 23, 2012
Forget-Me-Not Card
Hi everyone
Today I'm sharing my last project and blog for Kerry's Crafty Cards & Cuts Design Team. I want to thank Kerry & Alanna for giving me the opportunity to be part of a Design Team and I have thoroughly enjoyed the last 6 months. I have learnt so many new techniques and have made some lovely friends, and for that I'm very grateful.
So, here it is....I made this card for a lovely friend of mine. I used Kaisercrafts Forget-Me-Not Paper Collection, along with a plain paper doily that I sprayed with Tattered Angels Glimmer Mist (Old Lace) and added some metallic embellishments.
To find all the materials you would need to make this card, please visit www.kerryscraftycardsandcuts.com.au/store/
Again, thanks to the whole Design Team and thanks to all of you for checking out my posts.
Take care and happy crafting
Sandra xo
Wednesday, December 19, 2012
Forget-me-not Layout
Hi everyone
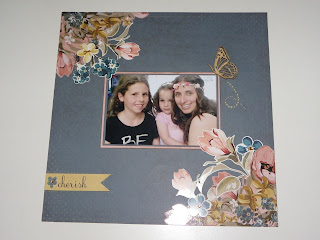
Just wanted to share my layout for this month's Design Team Project. This month I got to play with one of Kaisercraft's new paper collections, Forget-Me-Not.
I did find it a bit difficult to work with at first but I'm really happy with the end result. The photo in this layout includes my favourite girls, my little one (at her 2nd Birthday party) with my two nieces. This is one of my absolute favourite photos. The only thing to make it perfect would be to have my little angel (Lara, now sleeping in heaven) included, so I added the little wooden flourish butterfly to symbolise her.
I hope this layout inspires you and remember for all of your scrapbooking, papercrafting needs, please visit www.kerryscraftycardsandcuts.com.au/store/ and I know that Kerry will be only to happy to help.
Thanks
S xx
Wednesday, December 5, 2012
2 of my favourite things......Copic Markers & La La Land Stamps
Hi everyone,
This week I'm sharing two of my favourite things (for crafting that is), my Copic Ciao Markers and La La Land Stamps!!
Tag: Ranger Craft Tags (size #8)
This week I'm sharing two of my favourite things (for crafting that is), my Copic Ciao Markers and La La Land Stamps!!
I coloured this little cutie for my daughter's 2nd birthday invitations.
Tag: Ranger Craft Tags (size #8)
Paper: Kaisercraft Miss Nelly
Stamp: La La Land - Sugar n Spice Marci
Copics: E33, E35, E37, E47, YR000, YR00, RV02, RV04, RV06, B02, B05, C5
Stickles: Thistle
Copics are so much fun, I love how you can blend the colours to create shading and even make new colours. I have to warn you though...they are very addictive!! You can't stop at a few markers, before you know it, you'll want (need!!) them all!
Anyway, you can get all your copics, La La Land stamps and everything crafty over at www.kerryscraftycardsandcuts.com.au/store/
Happy colouring!
S x
Wednesday, November 14, 2012
Magnolia Grove Gift Box & Card
Hi, Sandra here! Just dropping in to say hi and share my project for this week.
This week I got to play with one of my favourite Kaisercraft Collections, Magnolia Grove. I love the subtle colours and the lovely floral patterns.
I found a cute little box which was just the perfect size for a gift that I got for a friend of mine but it just looked a bit sad and plain....so, of course it got a make over! I'm really happy with how its turned out. Its so rewarding to take something really plain and ordinary and then by adding some of the gorgeous papers that are available, you can make something original and unique.
I added one of Kaisercraft's Magical Butterfly Wooden Flourishes to the lid.
With all the little offcuts, some lace and some collectables, I made a little gift card to match.
Magnolia Grove, as well as many other paper collections and goodies are available from www.kerryscraftycardsandcuts.com.au/store/ , make sure you pop by and say hi.
Have a great week!!
S xx
Wednesday, November 7, 2012
I love my Copics!!
Hi everyone, I'm so excited that my DT project for this week is all about Copics!! I first bought my copics last year and only had about 10 ciao markers....now my collection has slowly grown to 52. And I've got a wish list a mile long.
I love the flexibilty you get with using copics...they blend so well and the you can even make up your own colour combinations by blending different colours.
If you are new to Copics, I would suggest going on youtube and checking out the many tutorials etc and then you can get an idea of where to start with choosing your collection. Just remember when colouring stamps with copics to use X-press blending card and Momento Tuxedo Black Ink.
The stamp I using this week is such a cutie....its 'Back to school Luka' from La La Land Stamps. I decided to colour him and make a card for my nephew, who is turning 13 this week.
The photos below show the different stages of colouring and the also has which colours I used.
I hope he likes it and I hope this inspires you to get out your copics and have a colour!! I find colouring so therapeutic and relaxing...so go on, have a go!
Thanks
I love the flexibilty you get with using copics...they blend so well and the you can even make up your own colour combinations by blending different colours.
If you are new to Copics, I would suggest going on youtube and checking out the many tutorials etc and then you can get an idea of where to start with choosing your collection. Just remember when colouring stamps with copics to use X-press blending card and Momento Tuxedo Black Ink.
The stamp I using this week is such a cutie....its 'Back to school Luka' from La La Land Stamps. I decided to colour him and make a card for my nephew, who is turning 13 this week.
The photos below show the different stages of colouring and the also has which colours I used.
Here he is all finished and cut out, ready for placement on a card!
The orange shimmer card was from my stash but every thing else is available from http://www.kerryscraftycardsandcuts.com.au/store/
Materials used:
Kaisercraft's Sears and Son Collection
Kaisercrafts Mini alpha stickers
La La Land Stamps
Copic Ciao Markers
I also decided to make a little gift card envelope to add to his card.....
I hope he likes it and I hope this inspires you to get out your copics and have a colour!! I find colouring so therapeutic and relaxing...so go on, have a go!
Thanks
S xx
Saturday, October 20, 2012
Bo Bunny: Rejoice
Alanna here today to share a quick beyond the page project with Bo Bunny's Rejoice collection (find in Kerry's store here).
I used a BTP standing word from Kaisercraft and decorated simply with papers from the Rejoice paper pad and embellishments from Kaisercraft's Twig and Berry collection.
Materials Used: Kaisercraft BTP Standing Word: Joy; Kaisercolour (green); Bo Bunny Rejoice Collection: paper pad; Kaisercraft Twig and Berry collection: collectables; Kaisercraft Be Merry collection: stamps; Kaisercraft rhinestone strips (silver); Memento ink (tuxedo black).
Hope that's got you in the Christmas spirit a little... something insane like <10 weeks to go. Eek!!
Wednesday, October 17, 2012
My Mind's Eye - Winter Wonderland
Hi all, this week I've been playing with a new collection, Winter Wonderland by My Mind's Eye. Its been fun playing with the cute litte 6x6 paper pad.
I love that these papers are double sided and the colour combinations are just lovely and modern!
I love that these papers are double sided and the colour combinations are just lovely and modern!
I think they've turned out really cute. I can't wait to use the rest of the paper pad!!
This collection as well as many other crafting supplies can be purchased from http://www.kerryscraftycardsandcuts.com.au/store/
Thanks, Sandra :)
Saturday, October 13, 2012
Perwinkle Cards
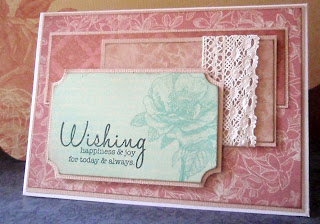
Alanna here today to share a couple of cards I've made this week with the Periwinkle collection. It was nicely timed as I had a few birthday cards to make for my grandmother and my auntie, so this collection was perfect for some nice, elegant cards :)
I've used the paper pad and collectables from the Periwinkle collection as well as some basic lace to add a little something extra. I've also inked the edges with Tim Holtz distress ink and backed each piece with cardstock. I love adding subtle depth to my cards, especially when they have to be posted!
Thanks for looking :)
- Alanna
Friday, October 12, 2012
Christmas Layout....
This week's
project for me was a layout using the Just Believe collection so I
decided to use a photo of my niece and nephew that was taken last year.
Aren't they adorable! I'm sure my sister doesn't think so all the time. I really enjoyed making this layout as the collection has so many papers that work well together.
If you want to use this as inspiration to make your own layouts head on over to Kerry's store and grab some bargains so you can start work!
Nxo
Wednesday, October 10, 2012
Butterfly Kisses - Foldable Gift Bag
Just dropping in to say hi (its Sandra here)!! I also wanted to share a cute little bag I made using Kaisercrafts Butterfly Kisses Collection.
I found this bag/box on pinterest and just had to make it....the instructions are a bit difficult to explain in writing but I'll give it a go.
Take a 12 x 12 double sided paper (I used Butterfly Kisses - Daisy Chain). Score in 3" from one side and then again 3" from the other. Fold at the score lines and then fold out.
Turn your paper 90 degrees then score at 4" from one side and then again at 4" from the other. Fold at the score lines.
Now turn paper back again and fold in the two sides that are at 3". You should have a rectangle in the center which measures 3"x6". For each place where the two fold lines intersect, you need to fold it back like above. (its tricky to explain but if you are really interested in seeing where I got the idea from please let me know and I can forward you the link!!)
Once folded it should look like the above. I punched out a decorative strip (Kaisercrafts Cardstock - Bubblegum) to add to the top and also punched out holes for the ribbon.
Then I decorated the front of the bag/box. I used papers and embellishments from the collection. I die cut a cute tag and attached it as well. You can really go crazy with the embellishing!
I think its really sweet and will definitely be using this for my little one's future birthday party favours.
I really love the little birds and butterflies in this collection! And the bright, happy colours are just so sweet.
If you love this collection as much as I do, or you are looking for other gorgeous papers and papercrafting supplies, please head over to www.kerryscraftycardsandcuts.com.au where the lovely Kerry will be only to happy to help you!
I hope you like my little project!
Thanks
S xx
Saturday, October 6, 2012
Periwinkle Pretty
Hi everyone, Alanna here today to show you a little BTP project I made with Kaisercraft's Periwinkle collection...
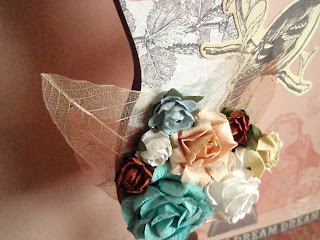
Materials Used: Kaisercraft BTP Dress Forms; Kaisercraft Periwinkle Collection: papers (whisper, secret), collectables; Kaisercraft mini paper blooms (iceberg, coconut, terracotta, honey); Kaisercraft paper blooms (coconut, honey, sea breeze); Kaisercolour (raw umber); skeleton leaves.
That's it from me today! Bye!! :)
Wednesday, October 3, 2012
Butterfly Kisses - Layout
Hi everyone!
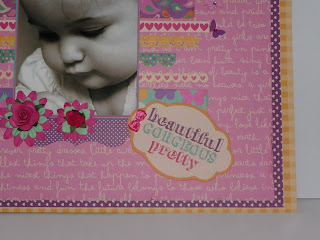
The design team so lovingly let me play with the very girlie and cute collection, Kaisercraft's Butterfly Kisses this month and I couldn't be happier!! I love the bright and bold colours. At first they can seem a bit in your face but as you start playing with them they are very easy to use.
I had seen a similar layout in a Australian Scrapbook Creation Magazine by Maria Featon, so I decided to use it for inspiration. I really like the different strips of patterned paper and the how the layout is layered with different types of papers from the collection.
For this layout, I used a beautiful photograph of my little Miss, which was taken last year. I think the black and white photograph looks great with the colourful background and embellishments.
Its difficult to tell, but in this photograph, my little Miss is fascinated by a fabric flower, so I thought it fitting to add flowers as an embellishment.
I have finally started using distressing techniques in my layouts....at first I found it quite difficult to do, but now I'm loving how it all looks and how easy it is to fix any little mishaps!!
The design team so lovingly let me play with the very girlie and cute collection, Kaisercraft's Butterfly Kisses this month and I couldn't be happier!! I love the bright and bold colours. At first they can seem a bit in your face but as you start playing with them they are very easy to use.
I had seen a similar layout in a Australian Scrapbook Creation Magazine by Maria Featon, so I decided to use it for inspiration. I really like the different strips of patterned paper and the how the layout is layered with different types of papers from the collection.
For this layout, I used a beautiful photograph of my little Miss, which was taken last year. I think the black and white photograph looks great with the colourful background and embellishments.
I have finally started using distressing techniques in my layouts....at first I found it quite difficult to do, but now I'm loving how it all looks and how easy it is to fix any little mishaps!!
So if I have inspired you to use this beautiful collection, then please head over to
for all of your scrapbooking and papercrafting supplies!!
Thanks
Sandra :)
Monday, October 1, 2012
Just Believe Cards....
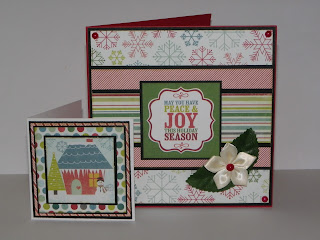
It's a new month which means a new collection to play with! I chose Just Believe for my projects as it has lots of real reds and greens which to me are the colours that represent christmas the best! I have made 4 cards for this week's project, 2 of which are basic cards and with the others I tried out some card designs that I hadn't made before. I'm amazed at how easy they were! I also decided to use some of the images I had coloured with my Copic Markers. They definitely brighten up any card!
How are you going with your christmas cards? Have you made a start on them yet? If so we'd love to see them, if not then head over to the store to check out all the christmas goodies that Kerry has.
Nxo
How are you going with your christmas cards? Have you made a start on them yet? If so we'd love to see them, if not then head over to the store to check out all the christmas goodies that Kerry has.
Nxo
Labels:
Card,
Copic,
Kaisercraft,
La La Land,
Magnolia,
Nicky
Subscribe to:
Comments (Atom)


